

Dashboard guide for Instructors
If you’re accessing your account from your mobile, press the 'burger' menu to see the available options. If you're accessing your account from your desktop, press different links and buttons to discover all options.

As an instructor, most of what you require for teaching students will be under the 'Courses' tab. Here, you can open courses and register students to the courses. You'll also find several helpful buttons, such as the materials and course requirements, and also the current prices and the discount tiers: https://molchanovs.knack.com/dashboard#courses-instructor/pricing/
Click on the 'Add Course' button and a pop-up will appear.

In this pop-up window, choose the course type and fill out the necessary course information. Click on ‘Submit’ once you have finished filling in the details.

Once you have successfully submitted the form, the course will appear on the list of ‘Courses You Are Teaching’. To access the course and to add students, click on the date of the course.

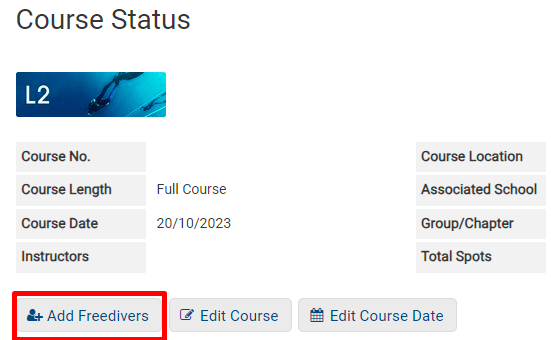
In the ‘Courses’ page, click on ‘Add Freedivers’ and fill out the details of your student(s) accordingly. Once you have submitted the details and made payment for the registration(s), your students will have access to the Dashboard and course materials.
First, click on the 'Courses' tab on the Dashboard, you'll see the list of courses you have. Click on the date for the course you would like to add an instructor to.

Next, once you are on the page of the course, click on the 'Edit Course' button.

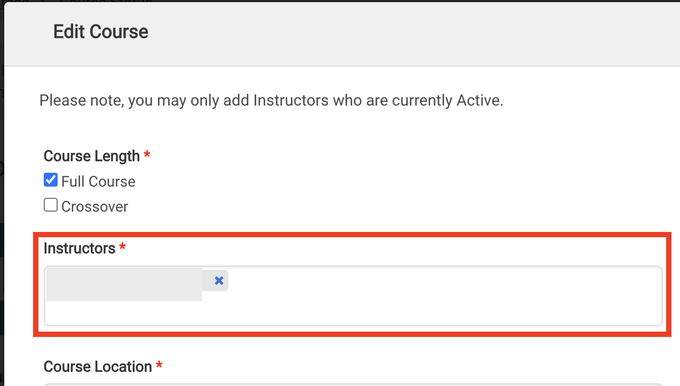
A pop-up window will appear. In the 'Instructors' box, type the name of the active instructor you wish to add and click on their name on the drop-down list. Once their name appears in the box, click the 'Submit' button at the bottom and the process is complete.
Click the checkbox to input the date that the student passed the exam.
Fill in all required fields and press 'Submit.' After each field is filled out, the following fields will be available for you to fill in.

Certification cards will be processed under two conditions:
If you wish to top up credit, click on the 'Courses' tab, and then click on the 'Pricing' button.

On the next page, scroll down to the section 'How to top up Credit' and follow the instructions.

After you click submit, you will be directed to the next page to make payment. Submit correct and valid card details top up.

Once you have added credit into your account, you’ll be able to register students and recharge your instructor membership by applying the credit as payment.
How to create a course
On the 'Instructor' page, you can find lots of essential information related to your current status, the number of remaining days left, the list of teachable courses, etc. Click on the link labeled 'Instructor' next to the 'Log Out' link on the top right-hand corner.
As an instructor, most of what you require for teaching students will be under the 'Courses' tab. Here, you can open courses and register students to the courses. You'll also find several helpful buttons, such as the materials and course requirements, and also the current prices and the discount tiers: https://molchanovs.knack.com/dashboard#courses-instructor/pricing/
Click on the 'Add Course' button and a pop-up will appear.
In this pop-up window, choose the course type and fill out the necessary course information. Click on ‘Submit’ once you have finished filling in the details.
Once you have successfully submitted the form, the course will appear on the list of ‘Courses You Are Teaching’. To access the course and to add students, click on the date of the course.
In the ‘Courses’ page, click on ‘Add Freedivers’ and fill out the details of your student(s) accordingly. Once you have submitted the details and made payment for the registration(s), your students will have access to the Dashboard and course materials.
Add another instructor to the course
If you want another instructor to certify the student, you must add them to the course. Note that only active instructors can be added. Refer to the steps below.First, click on the 'Courses' tab on the Dashboard, you'll see the list of courses you have. Click on the date for the course you would like to add an instructor to.
Next, once you are on the page of the course, click on the 'Edit Course' button.
A pop-up window will appear. In the 'Instructors' box, type the name of the active instructor you wish to add and click on their name on the drop-down list. Once their name appears in the box, click the 'Submit' button at the bottom and the process is complete.
How to complete certification process for students
To complete the certification process, you need to go to Dashboard > Courses > click on the course for your student(s) > scroll down to the section where you see your students’ details (refer to the screenshot below).Click the checkbox to input the date that the student passed the exam.
Fill in all required fields and press 'Submit.' After each field is filled out, the following fields will be available for you to fill in.
Certification cards will be processed under two conditions:
- After the certification is completed
- A photo is uploaded to their profile
How to top up credit
You may top up credit into your account and use the credit to pay for student registrations and your instructor membership.If you wish to top up credit, click on the 'Courses' tab, and then click on the 'Pricing' button.
On the next page, scroll down to the section 'How to top up Credit' and follow the instructions.
After you click submit, you will be directed to the next page to make payment. Submit correct and valid card details top up.
Once you have added credit into your account, you’ll be able to register students and recharge your instructor membership by applying the credit as payment.